
The Sauna Build
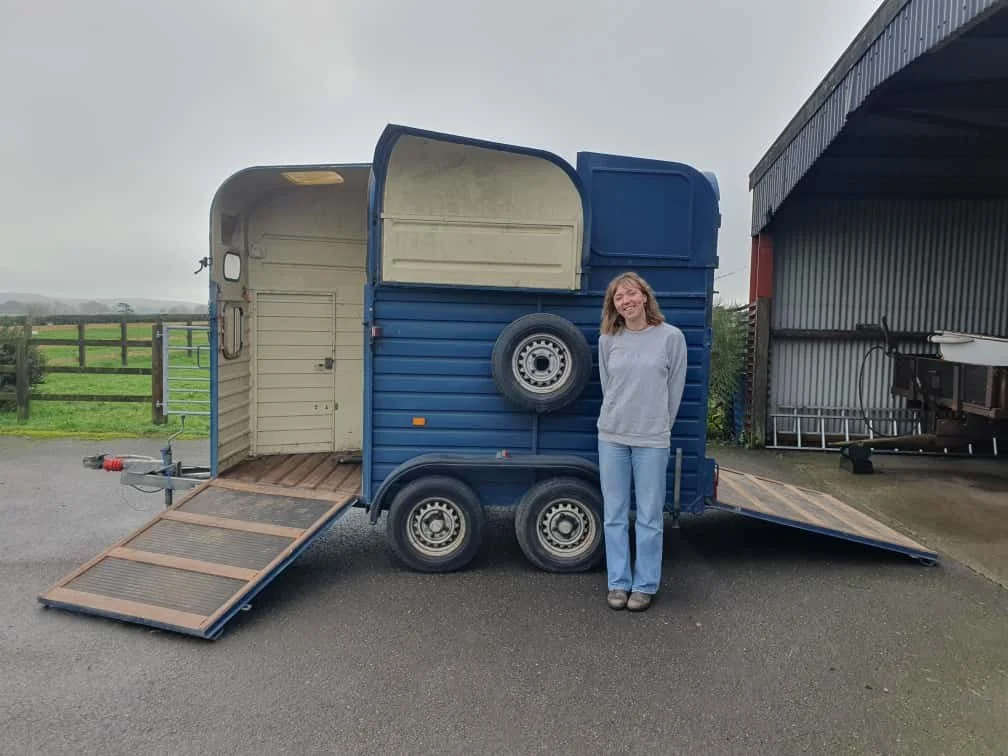
The Drift Sauna was hand-crafted by us and despite having undertaken small building projects before, we learnt a lot along the way! We’d love to share with you all a brief overview of our journey, turning a pre-loved rice horsebox trailer into a Finnish style steam sauna!
How it Started
What began as an optimistic one month project has morphed into 4 months of learning, building and creating our dream sauna. As we speak to more and more home builders we realise that this is not unusual!
1. Design
Sketching on paper napkins in coffee shops and dreamily looking through sauna guidebooks was the start of our process. We relied heavily on guides and the experience of friends and family to design our own sauna.
2. Cleaning & Sealing
Old horse boxes weren’t designed to be watertight, we’ve spent a lot of time and sealant plugging all the holes. One advantage to building it outside during winter is that we know exactly where the puddles form!
Evolution
Our scrappy, coffee stained napkin doodles rapidly transformed into properly (ish) sketched designs! Each stage of the drawing revealed more layers of things we did not understand, but taking the time to explore and create with purpose brought fulfilment and progress to the project.
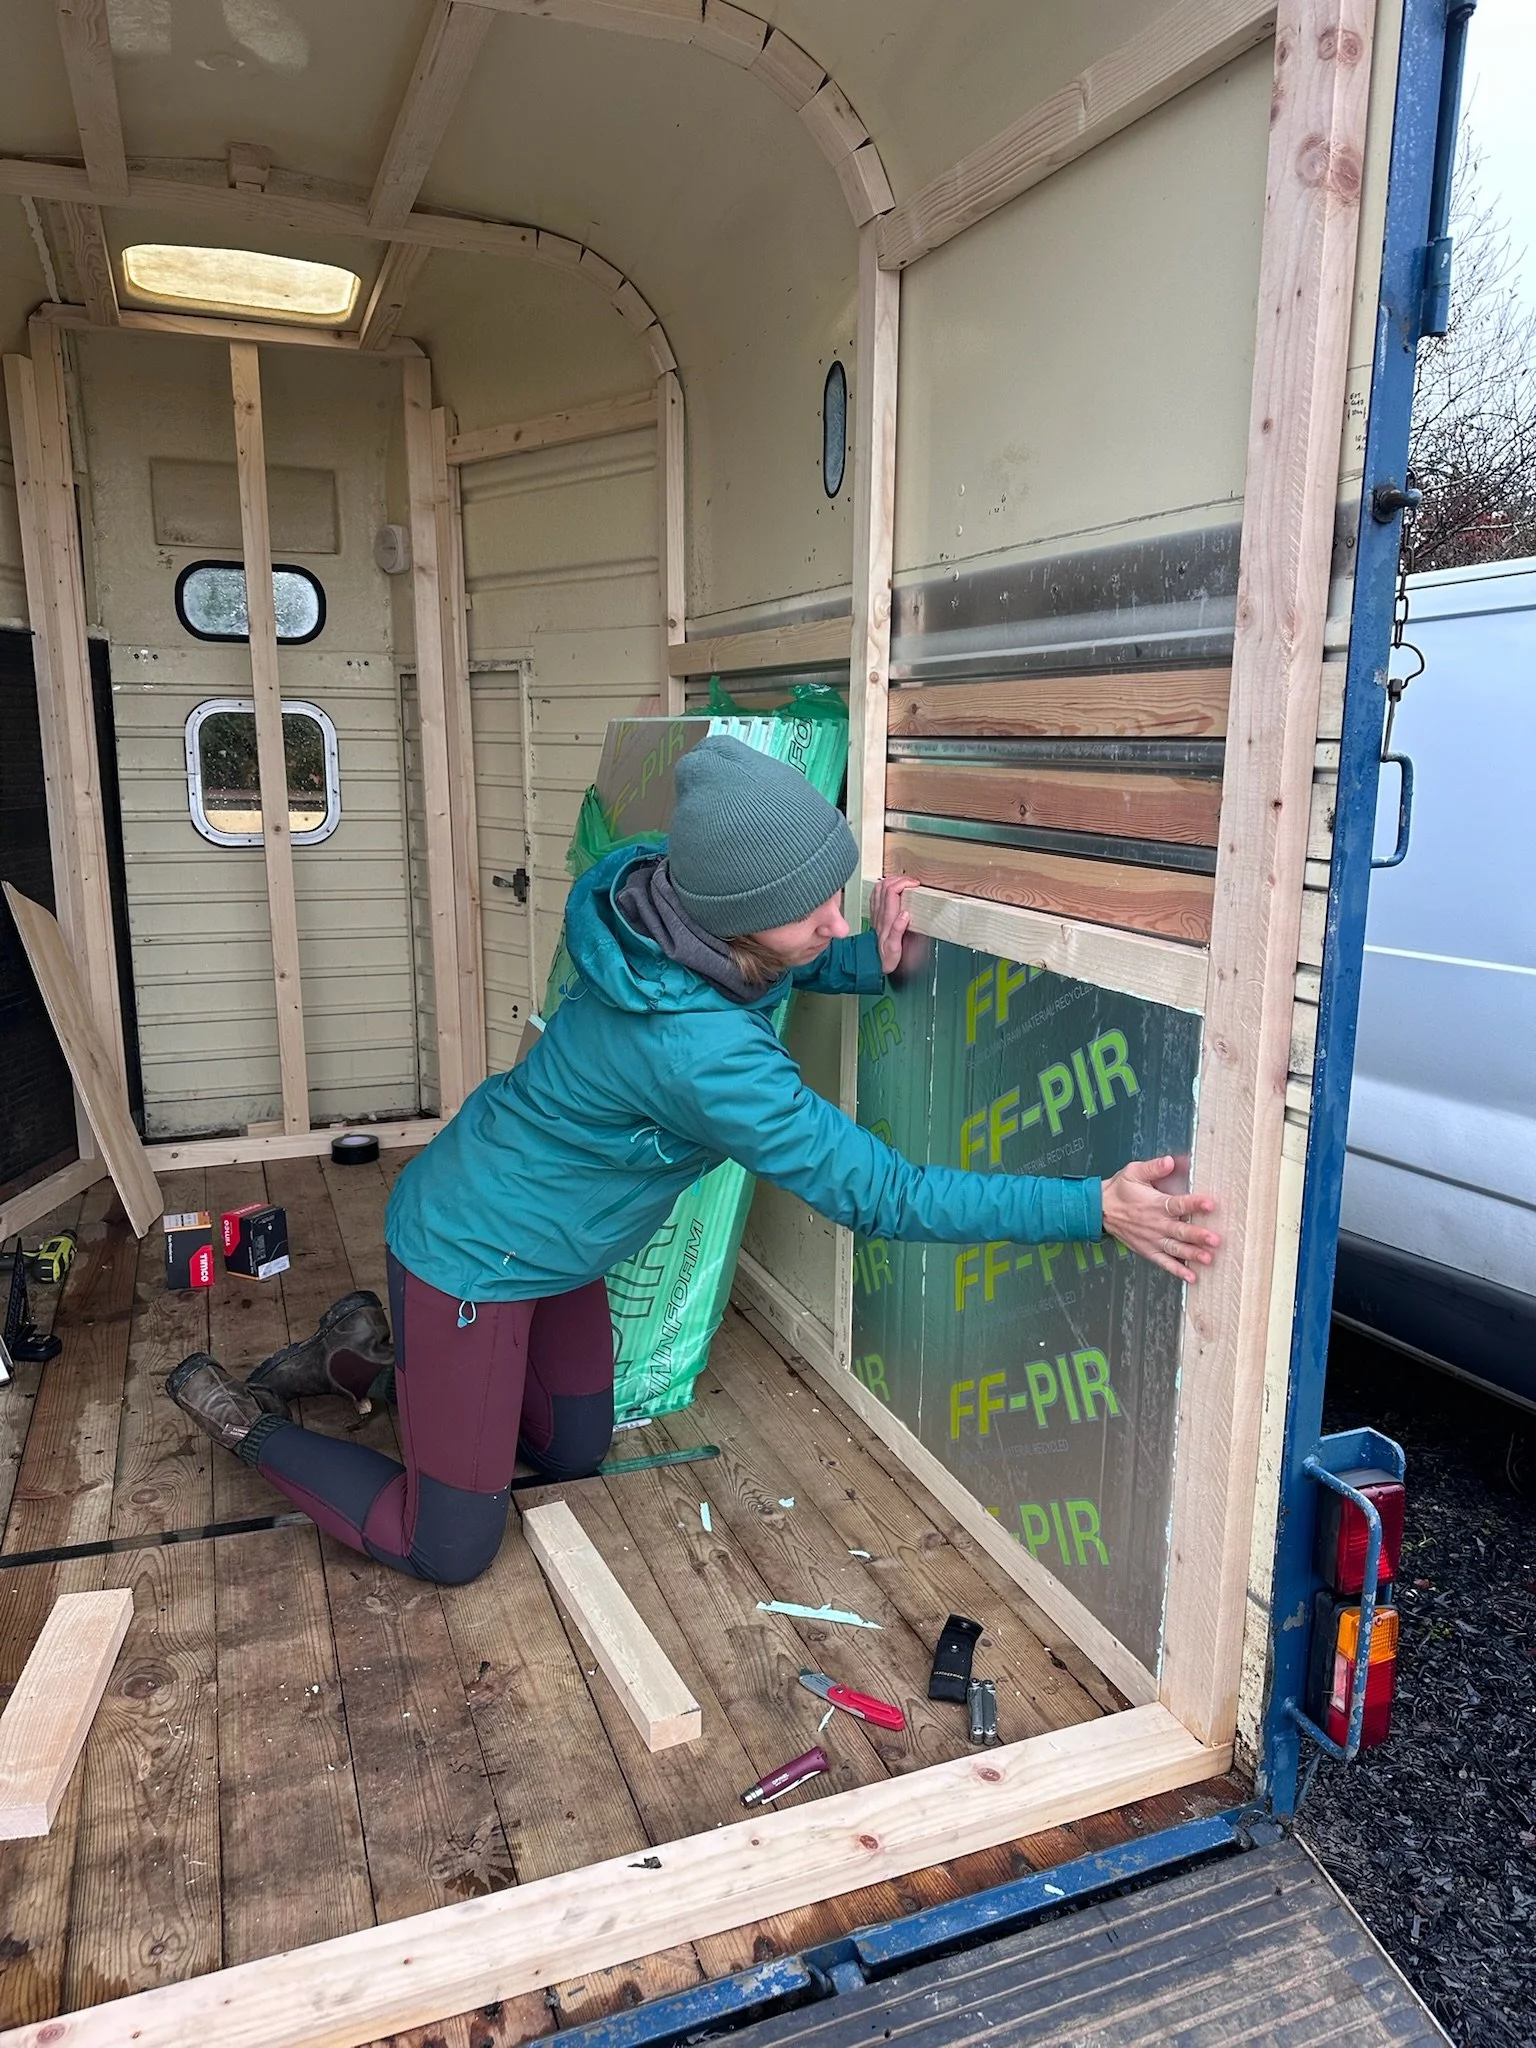
3. Studwork & Insulation
Building a sauna is all about managing heat and moisture, starting with the bones. The studwork and insulation was designed to allow airflow behind it, driving out moisture from the bits we’d never manage to seal. It also determined the location of the cladding battens, door, vents and stove location.
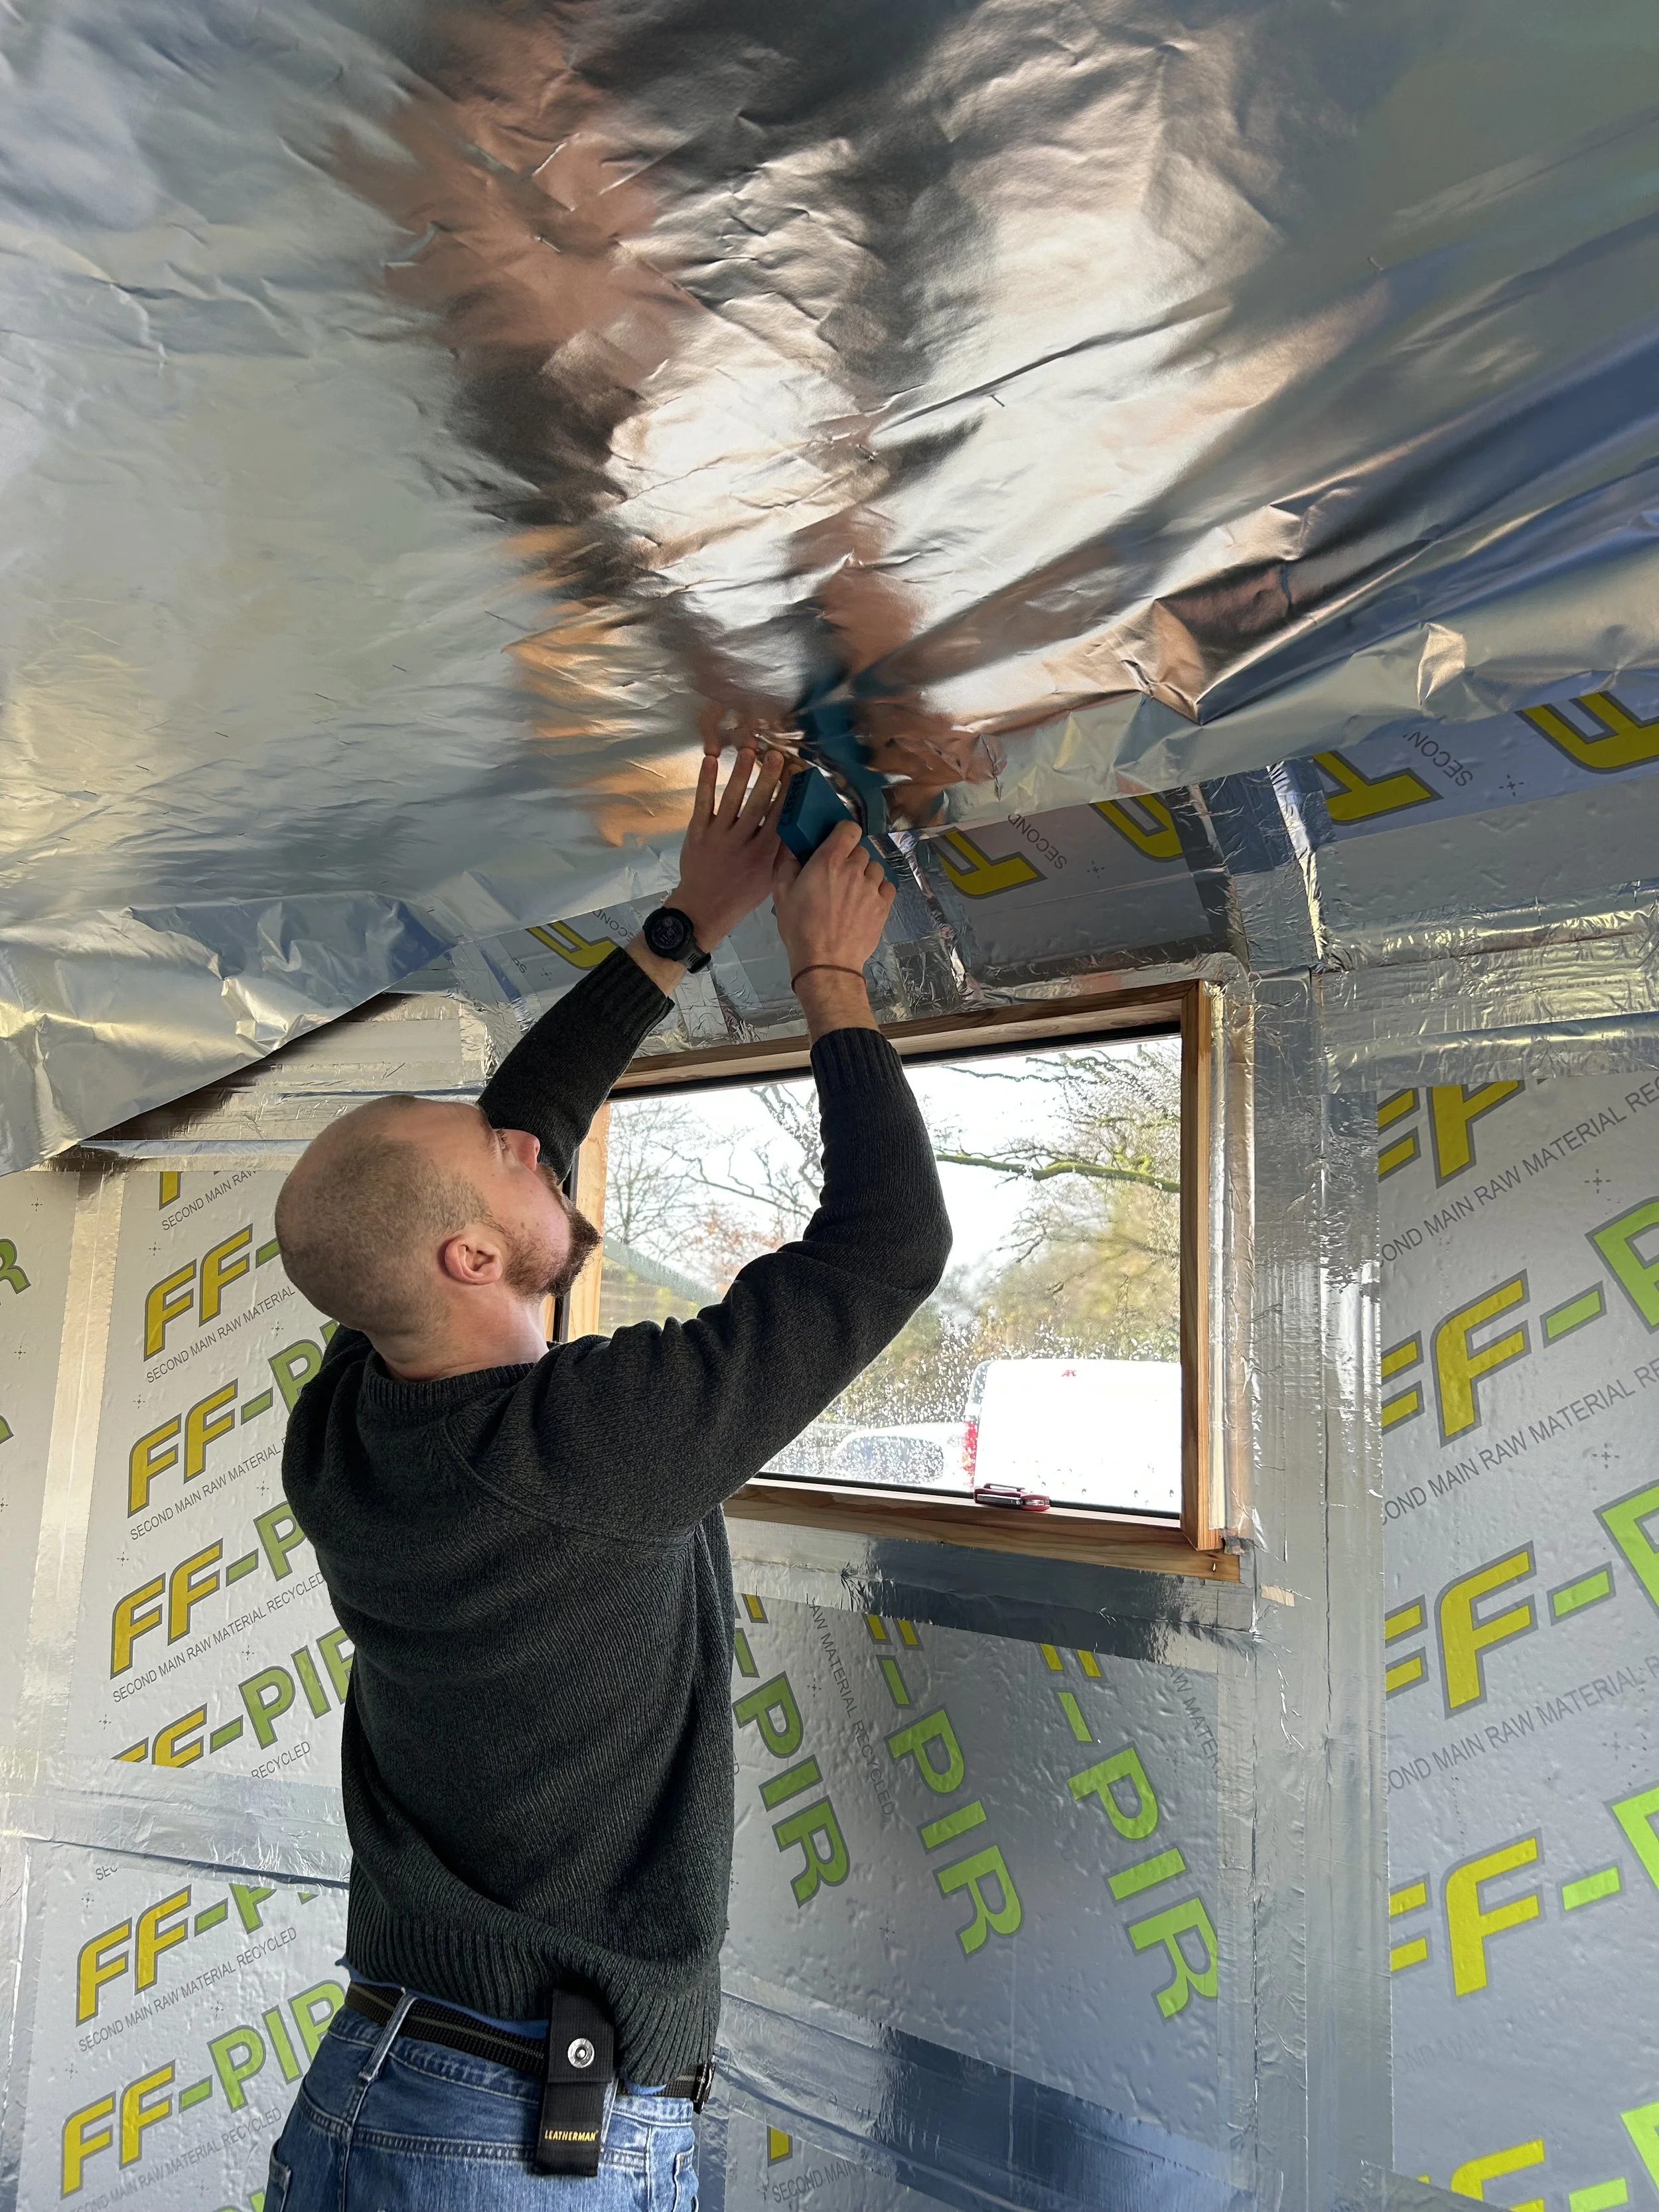
4. Windows & Door Frame
Next up we used a jigsaw to cut out the holes for the windows, using specially ordered double glazing and 6×1” cedar to make them. The “fake” wall was created using 38×63mm untreated pine, the door frame and insulation installed within it.
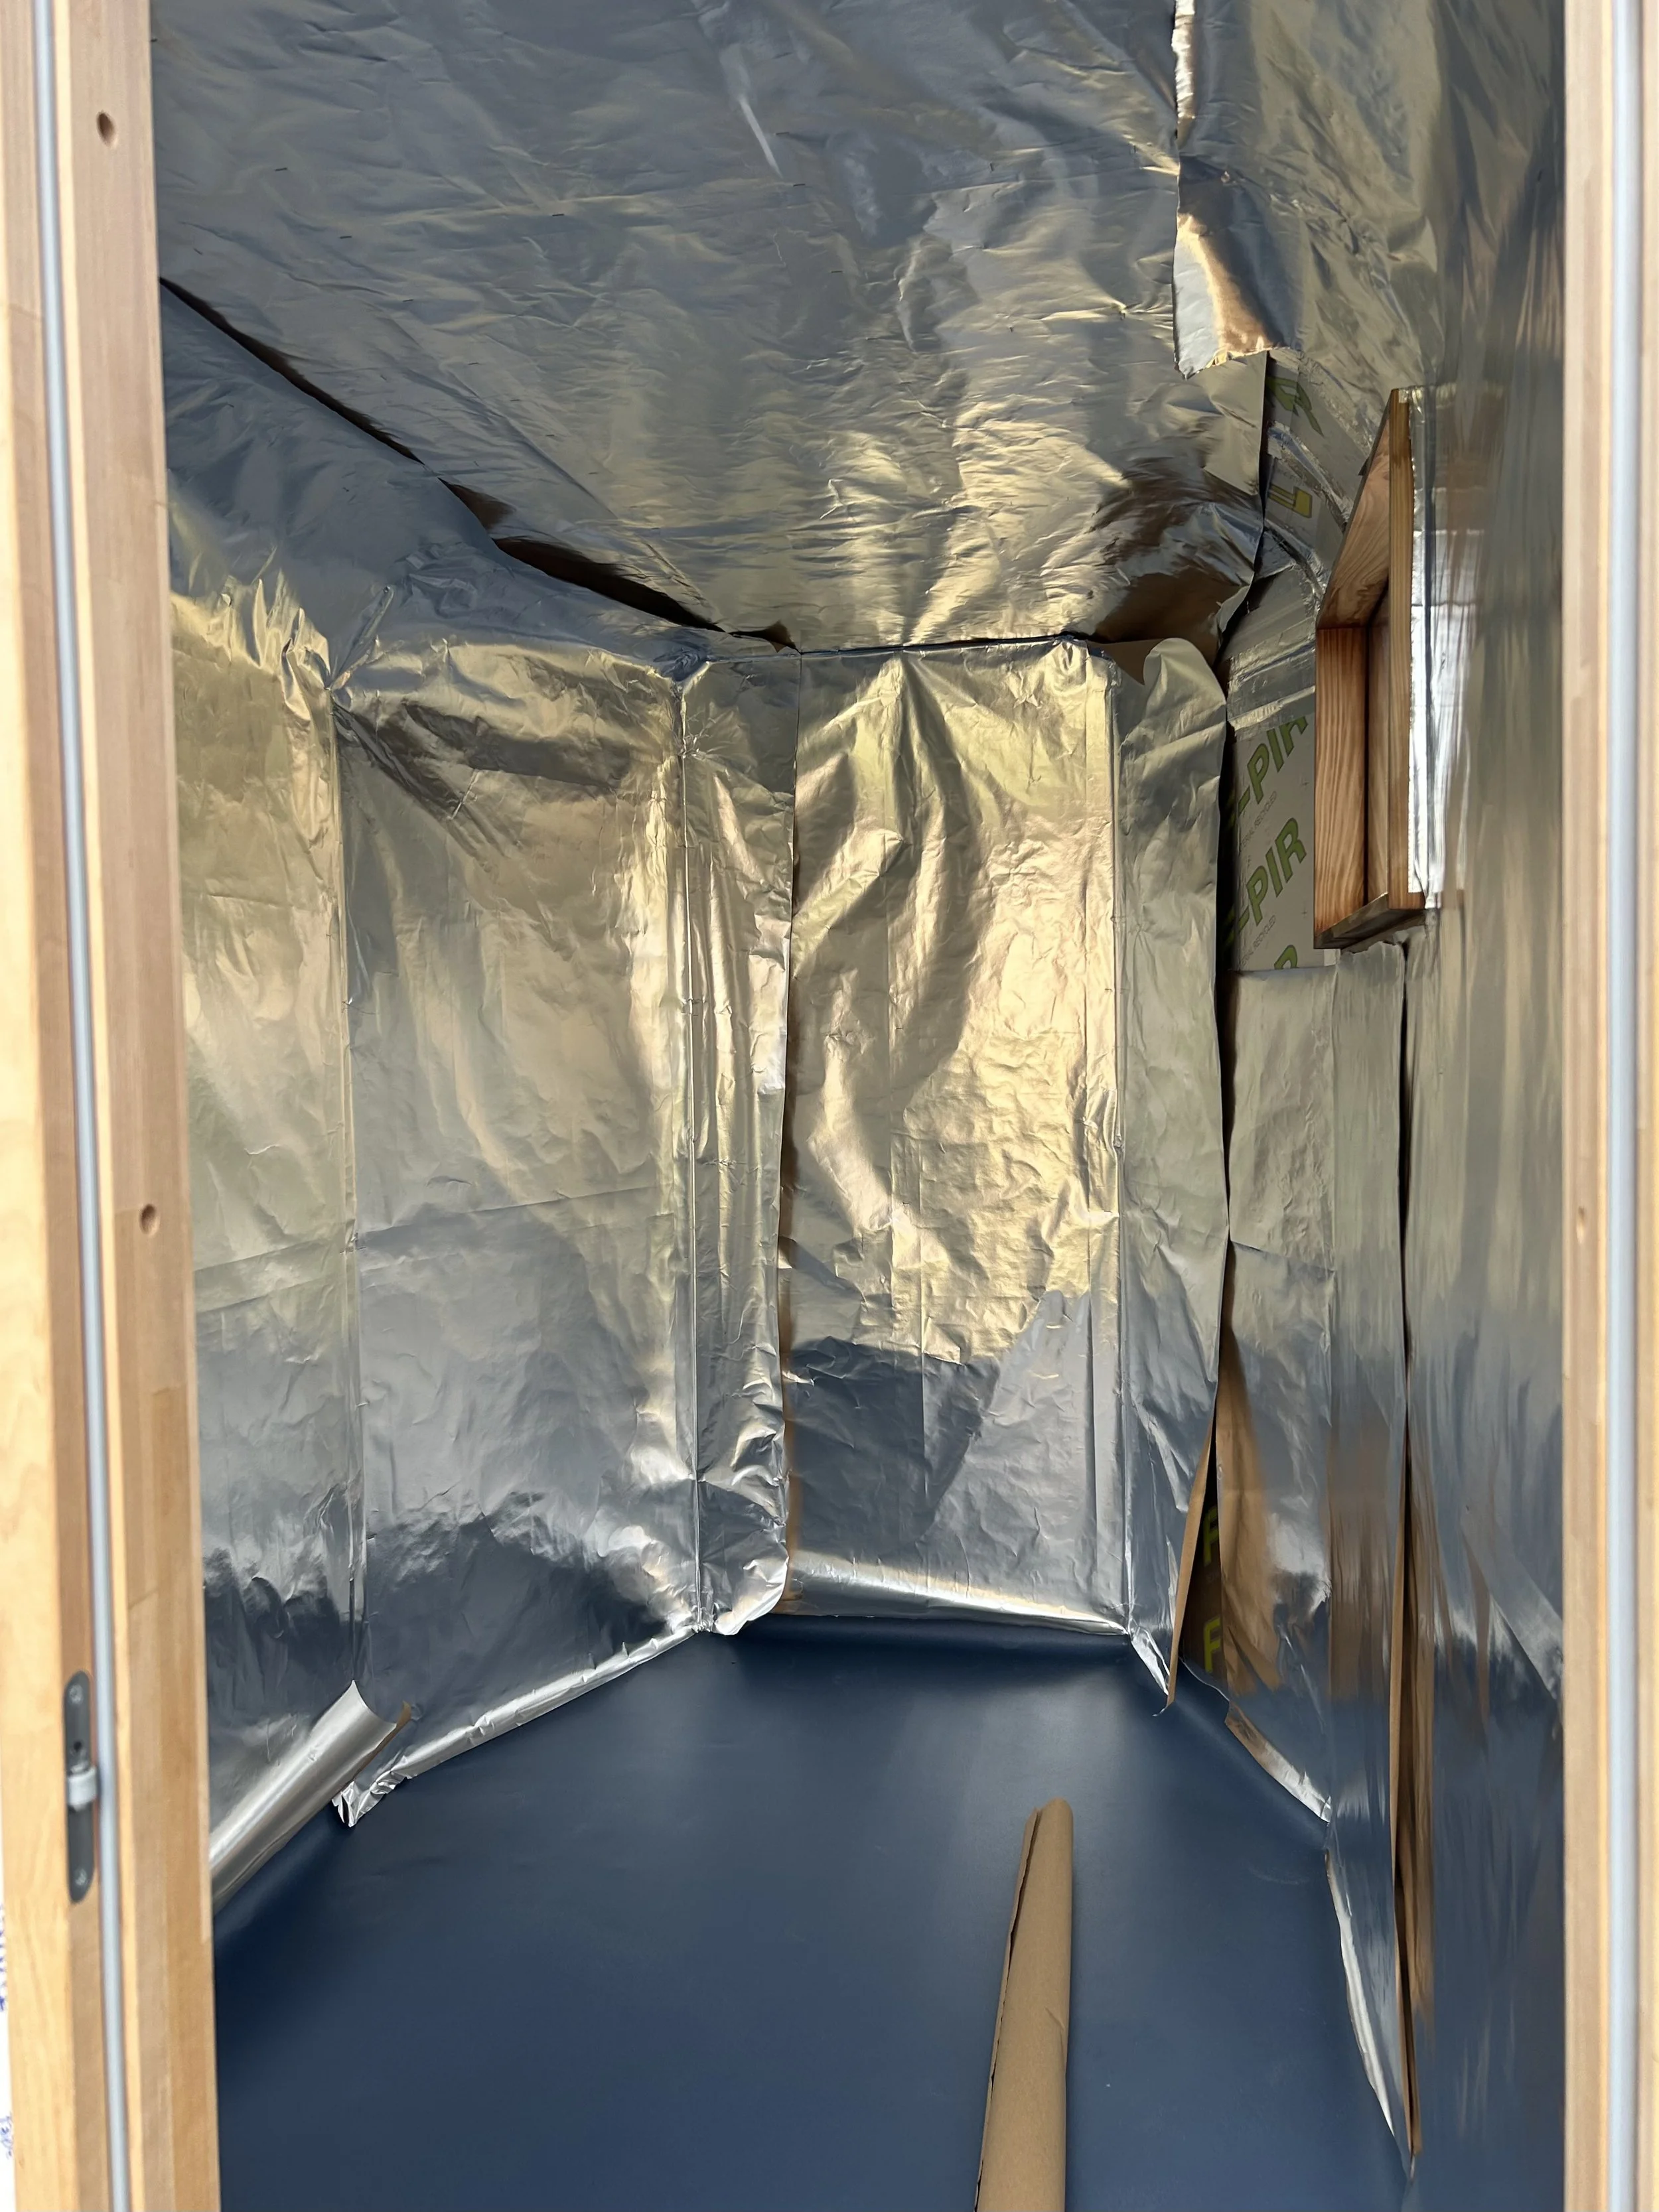
5. Vapour Barrier & Vinyl Floor
After all of the insulation was in place a second vapour barrier was installed. This was held in place with stainless steel staples and heat resistant aluminium tape. A heat resistant, anti-slip vinyl was laid on the floor and the vapour barrier secured over the edges to create a sealed, internal unit.
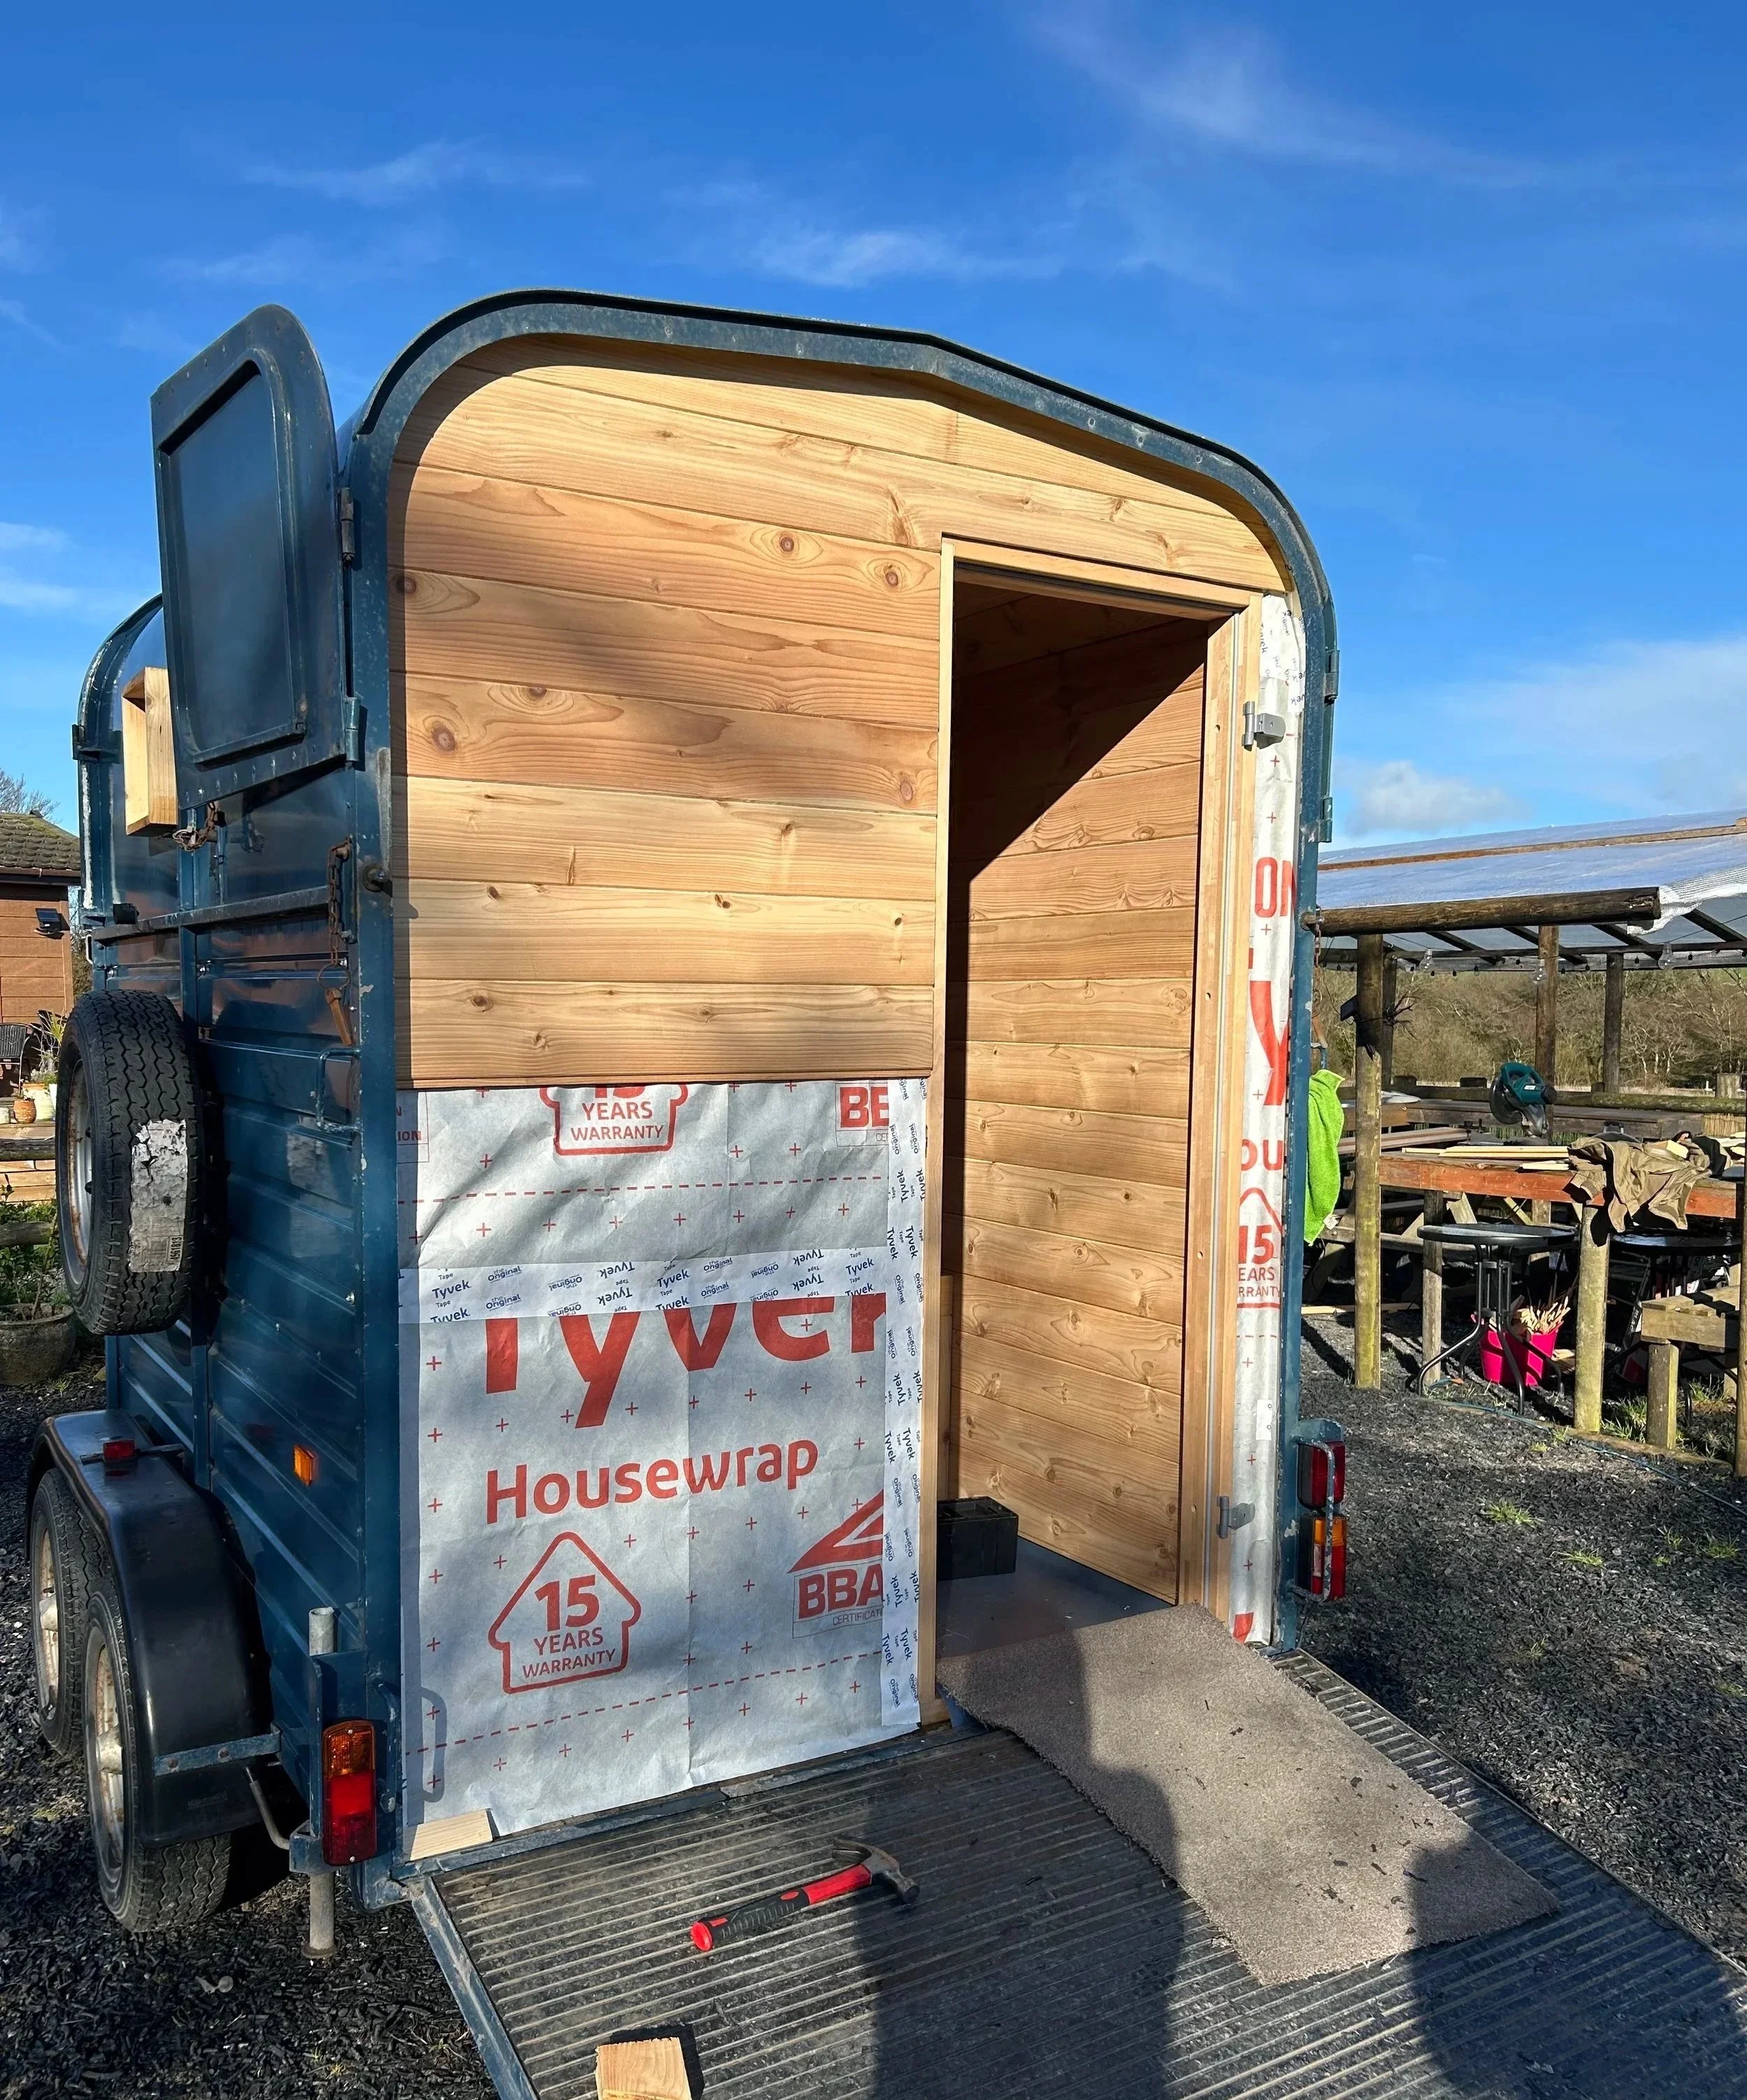
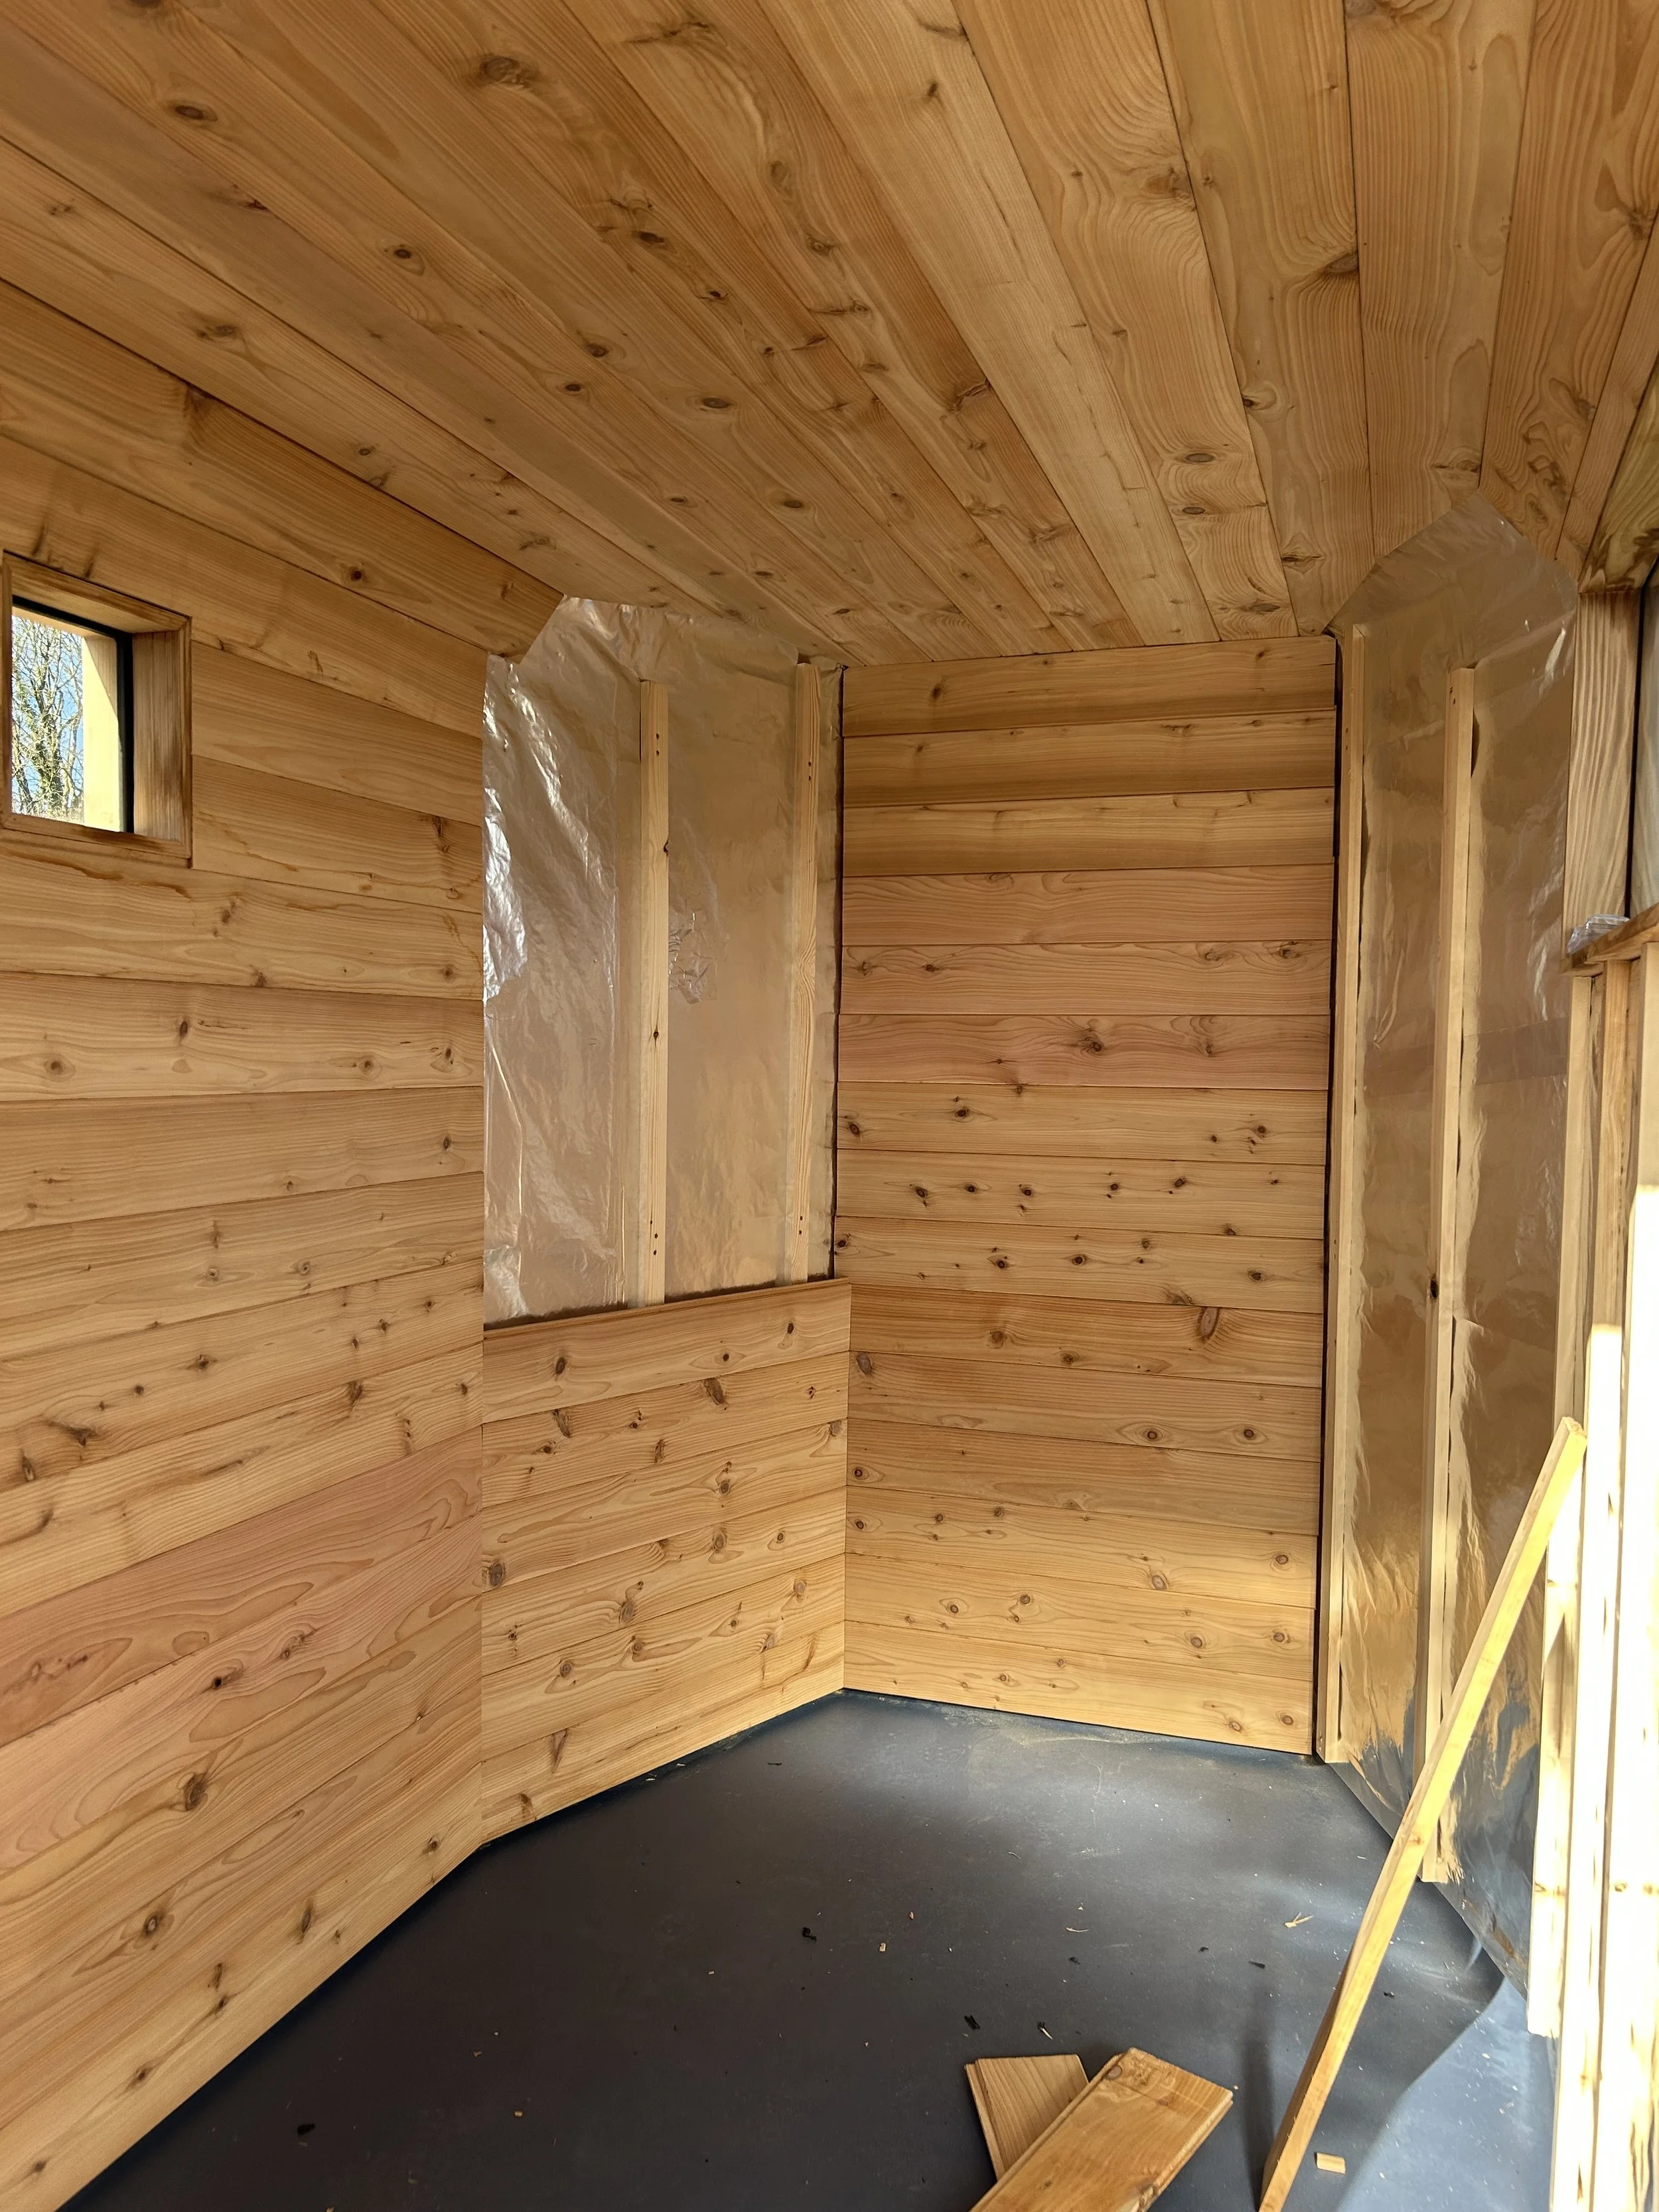
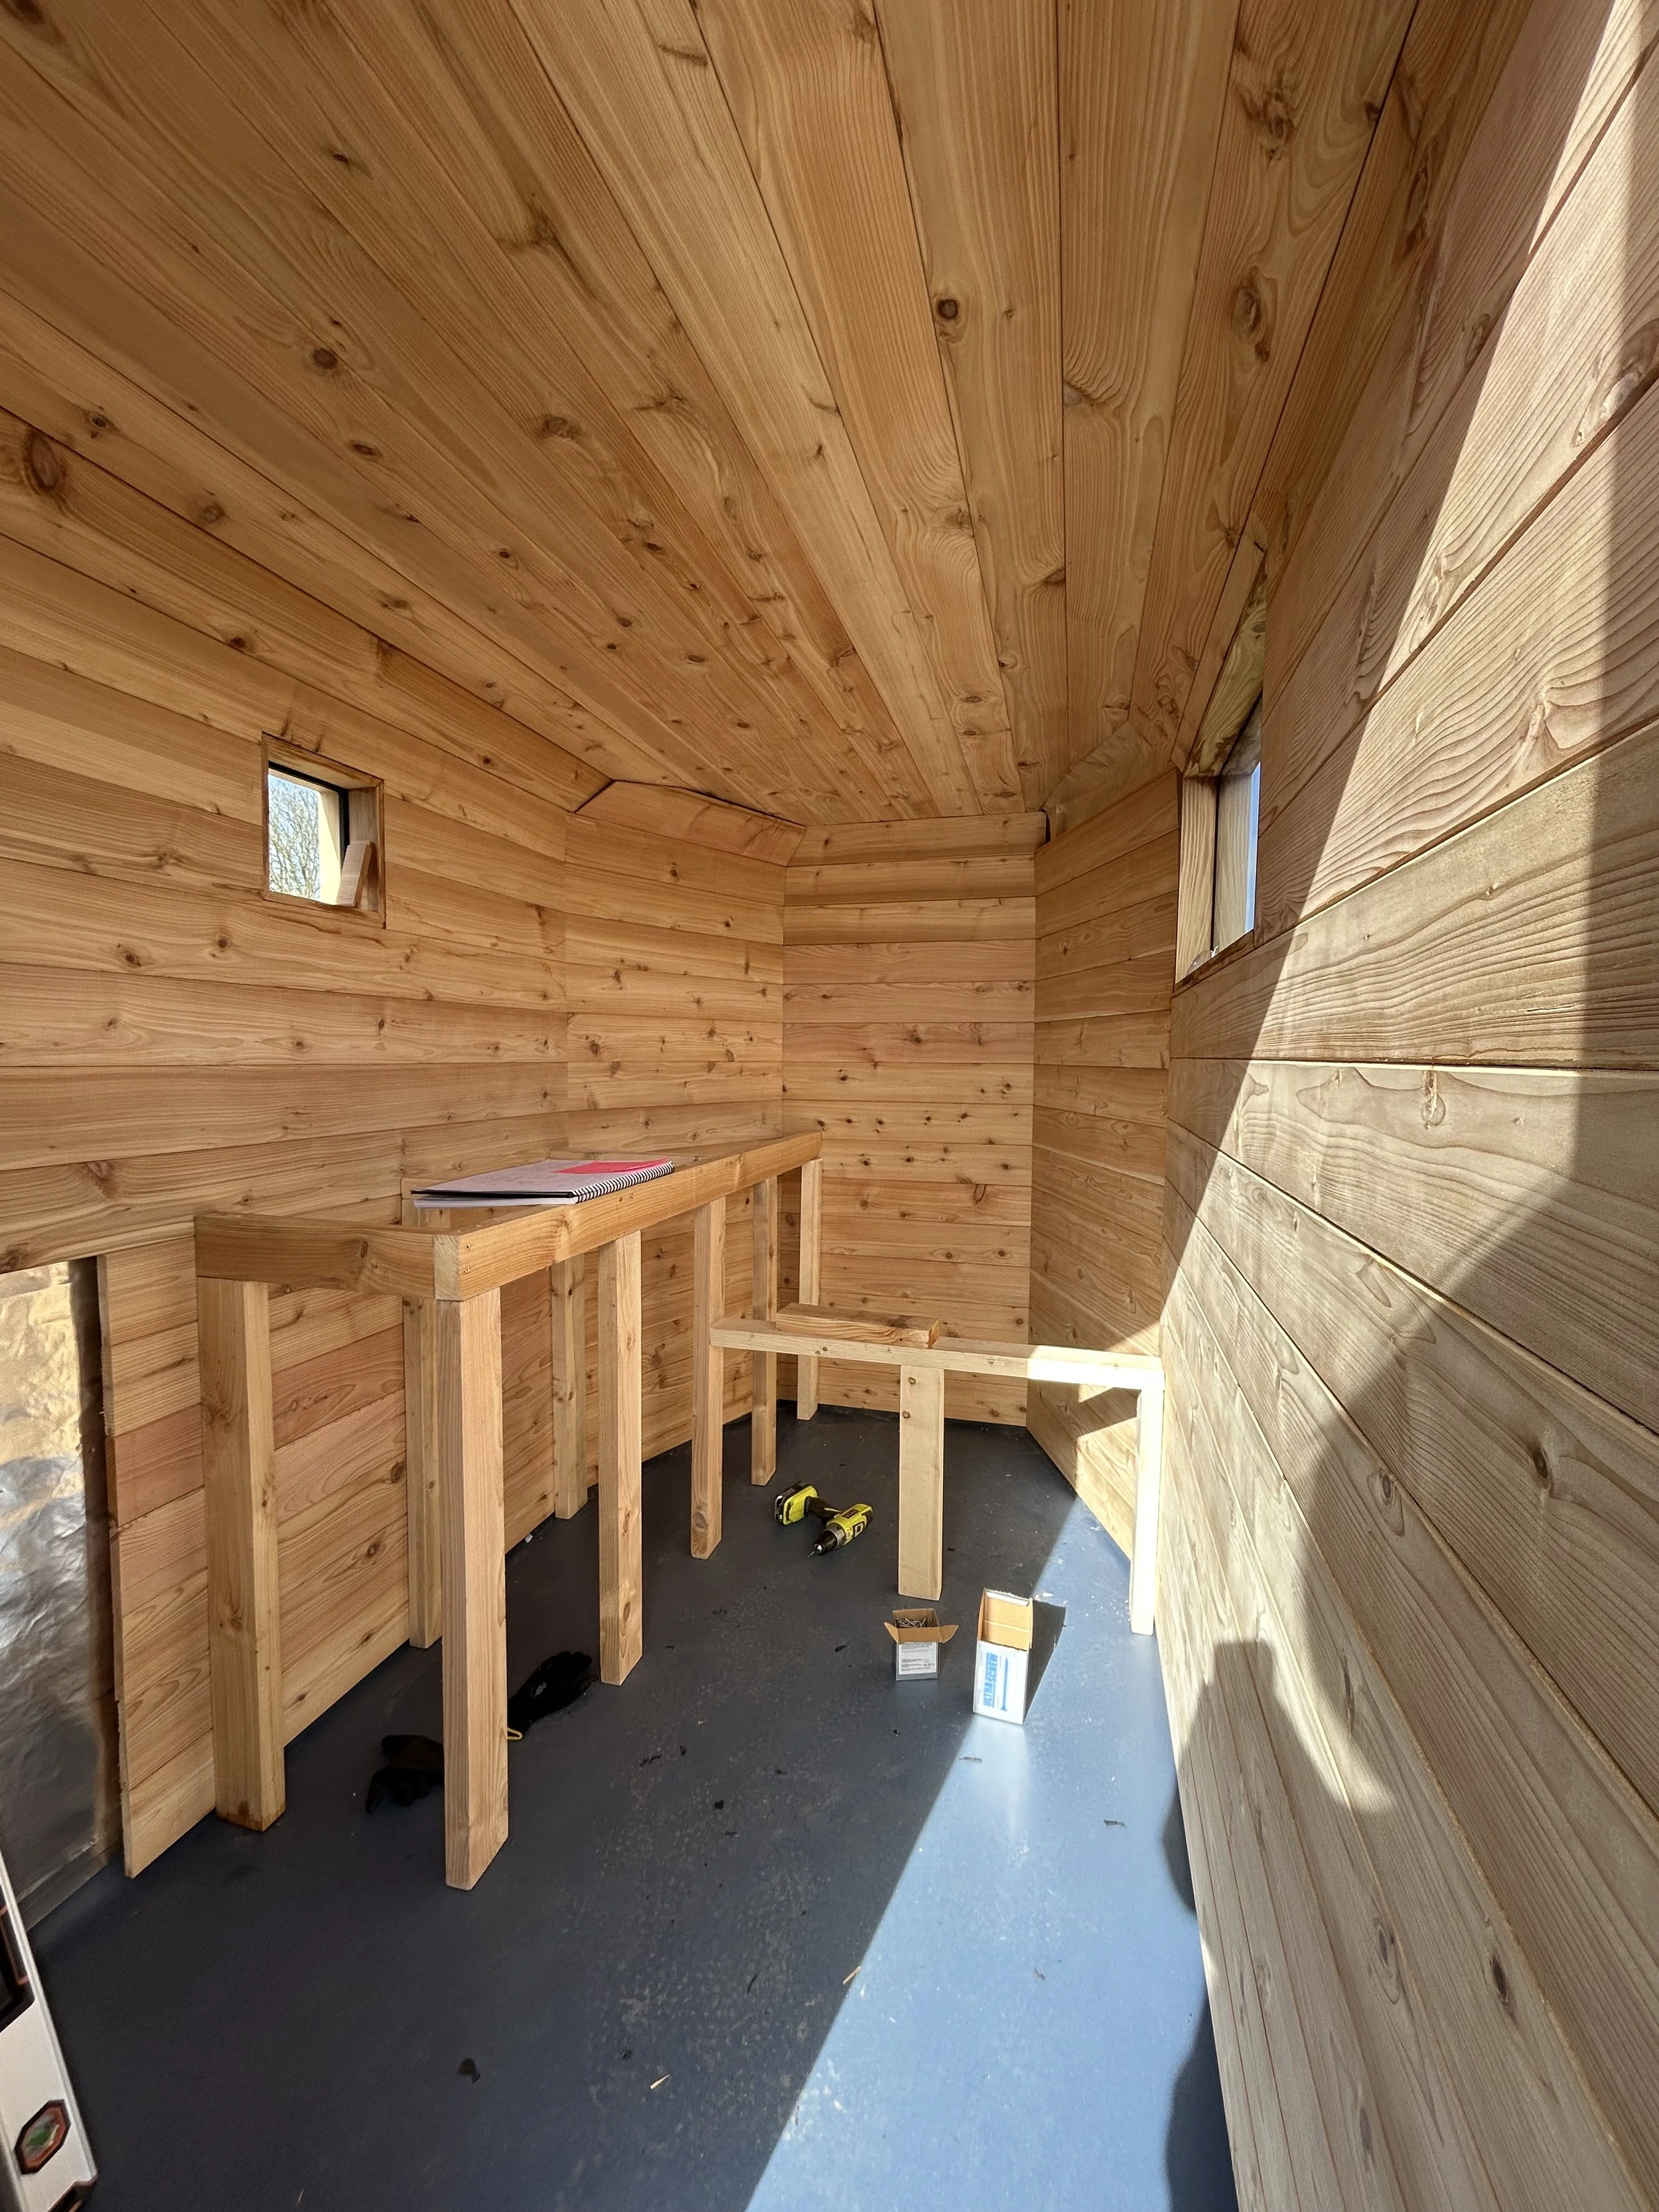
6. Battens & Cedar Cladding
Redwood battens were screwed to the stud work at 40cm intervals to secure the cedar cladding to. Using short intervals and lots of stainless nails (necessary for cedar!) will hopefully prevent warping and keep it all in place when underway. The cedar cladding was all pre-sanded and cut to fit, with some very intricate angles needed to trim the inside of the box.
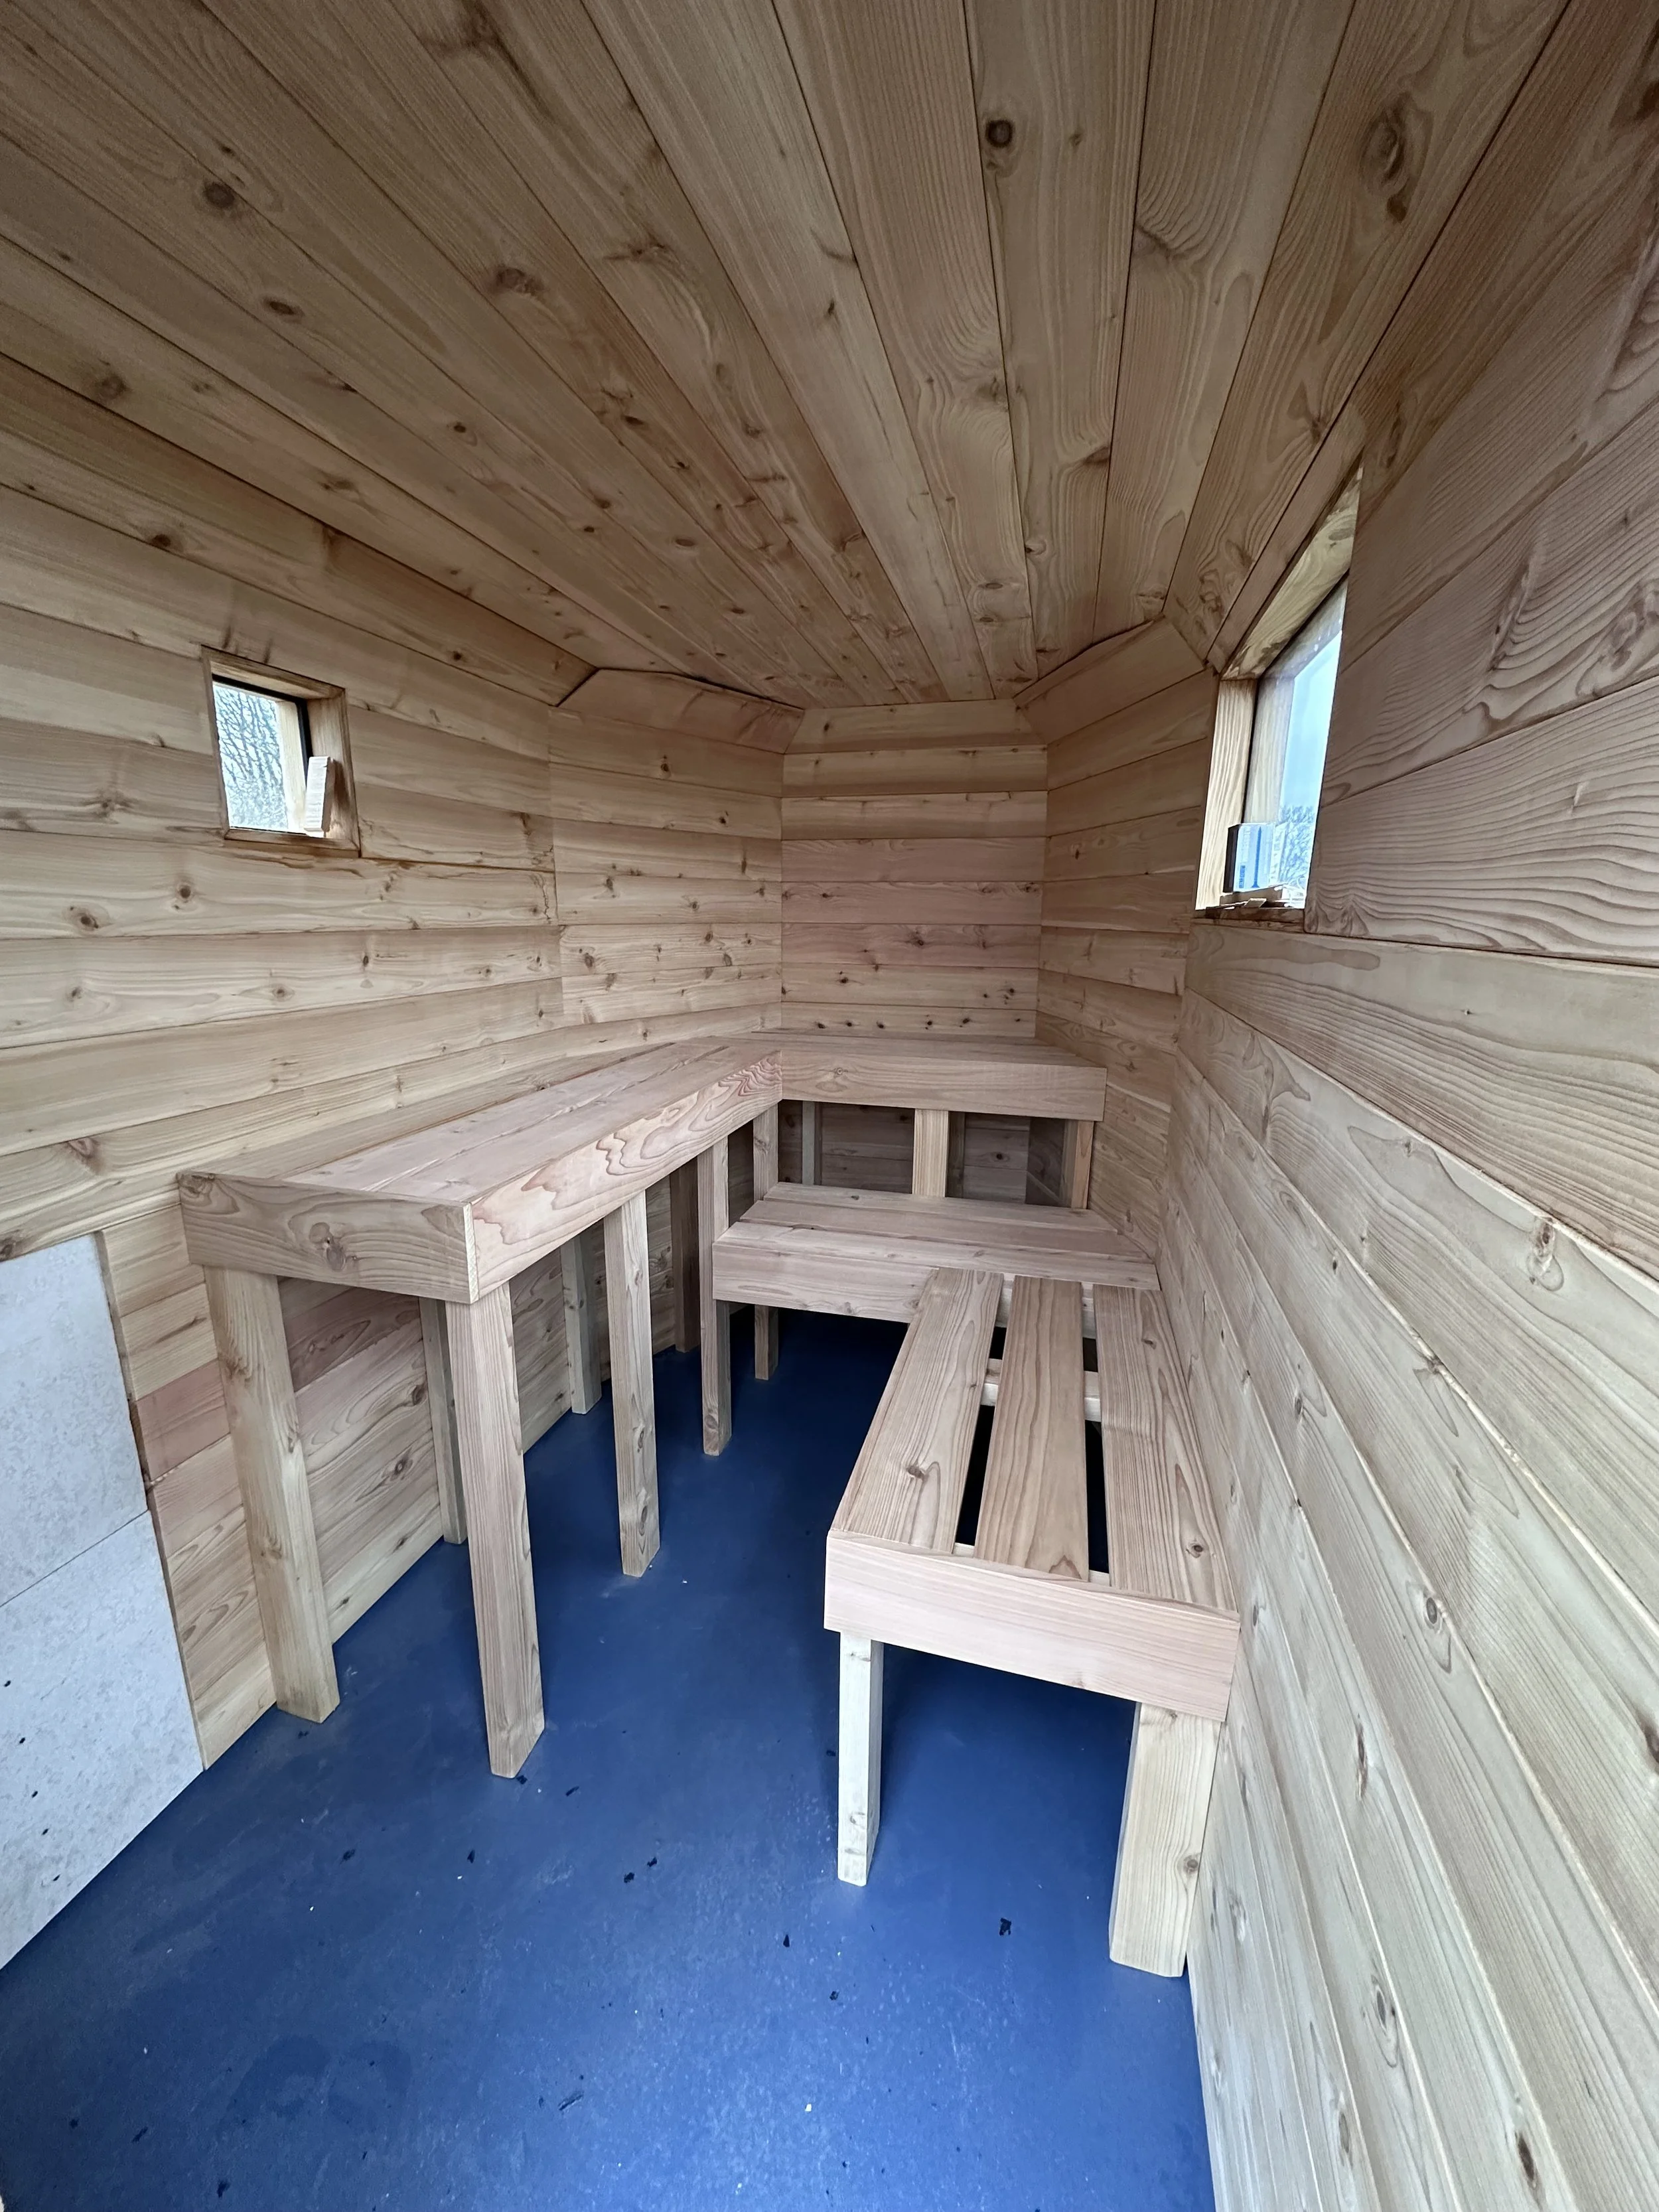
7. Benches
The benches are designed to be solidly built and easily maintained, with thick enough boards to not bend when sat on and also be regularly sanded down. The framing is built from cedar 2×4” and held together with well hidden stainless screws.
8. Heatproof Panels & Vents
Before the stove could be installed the vulnerable wood and floor of the sauna had to be protected, which we have done using cement fibre board and steel sheet. Three vents were installed to ensure proper aiflow through the sauna, one exhaust and two intakes. One of the intakes doubles as a drain.
Finishing Touches
The last bits to go were arguably the most time consuming and fiddly; it was important to take our time in this stage and prevent covering our former hard work and attention to detail by the mistakes caused by rushing.
9. Stove & Flue
Installing the stove really means securing it to the floor so that it cannot become a 100kg flaming rocket. To do so we have bolted straight through the floor layup, including the cement board and steel plate, and into the riv-nuts that held on the original feet. The flue was then cut into place, the 1-foot hole missing the studwork more by luck than guile.
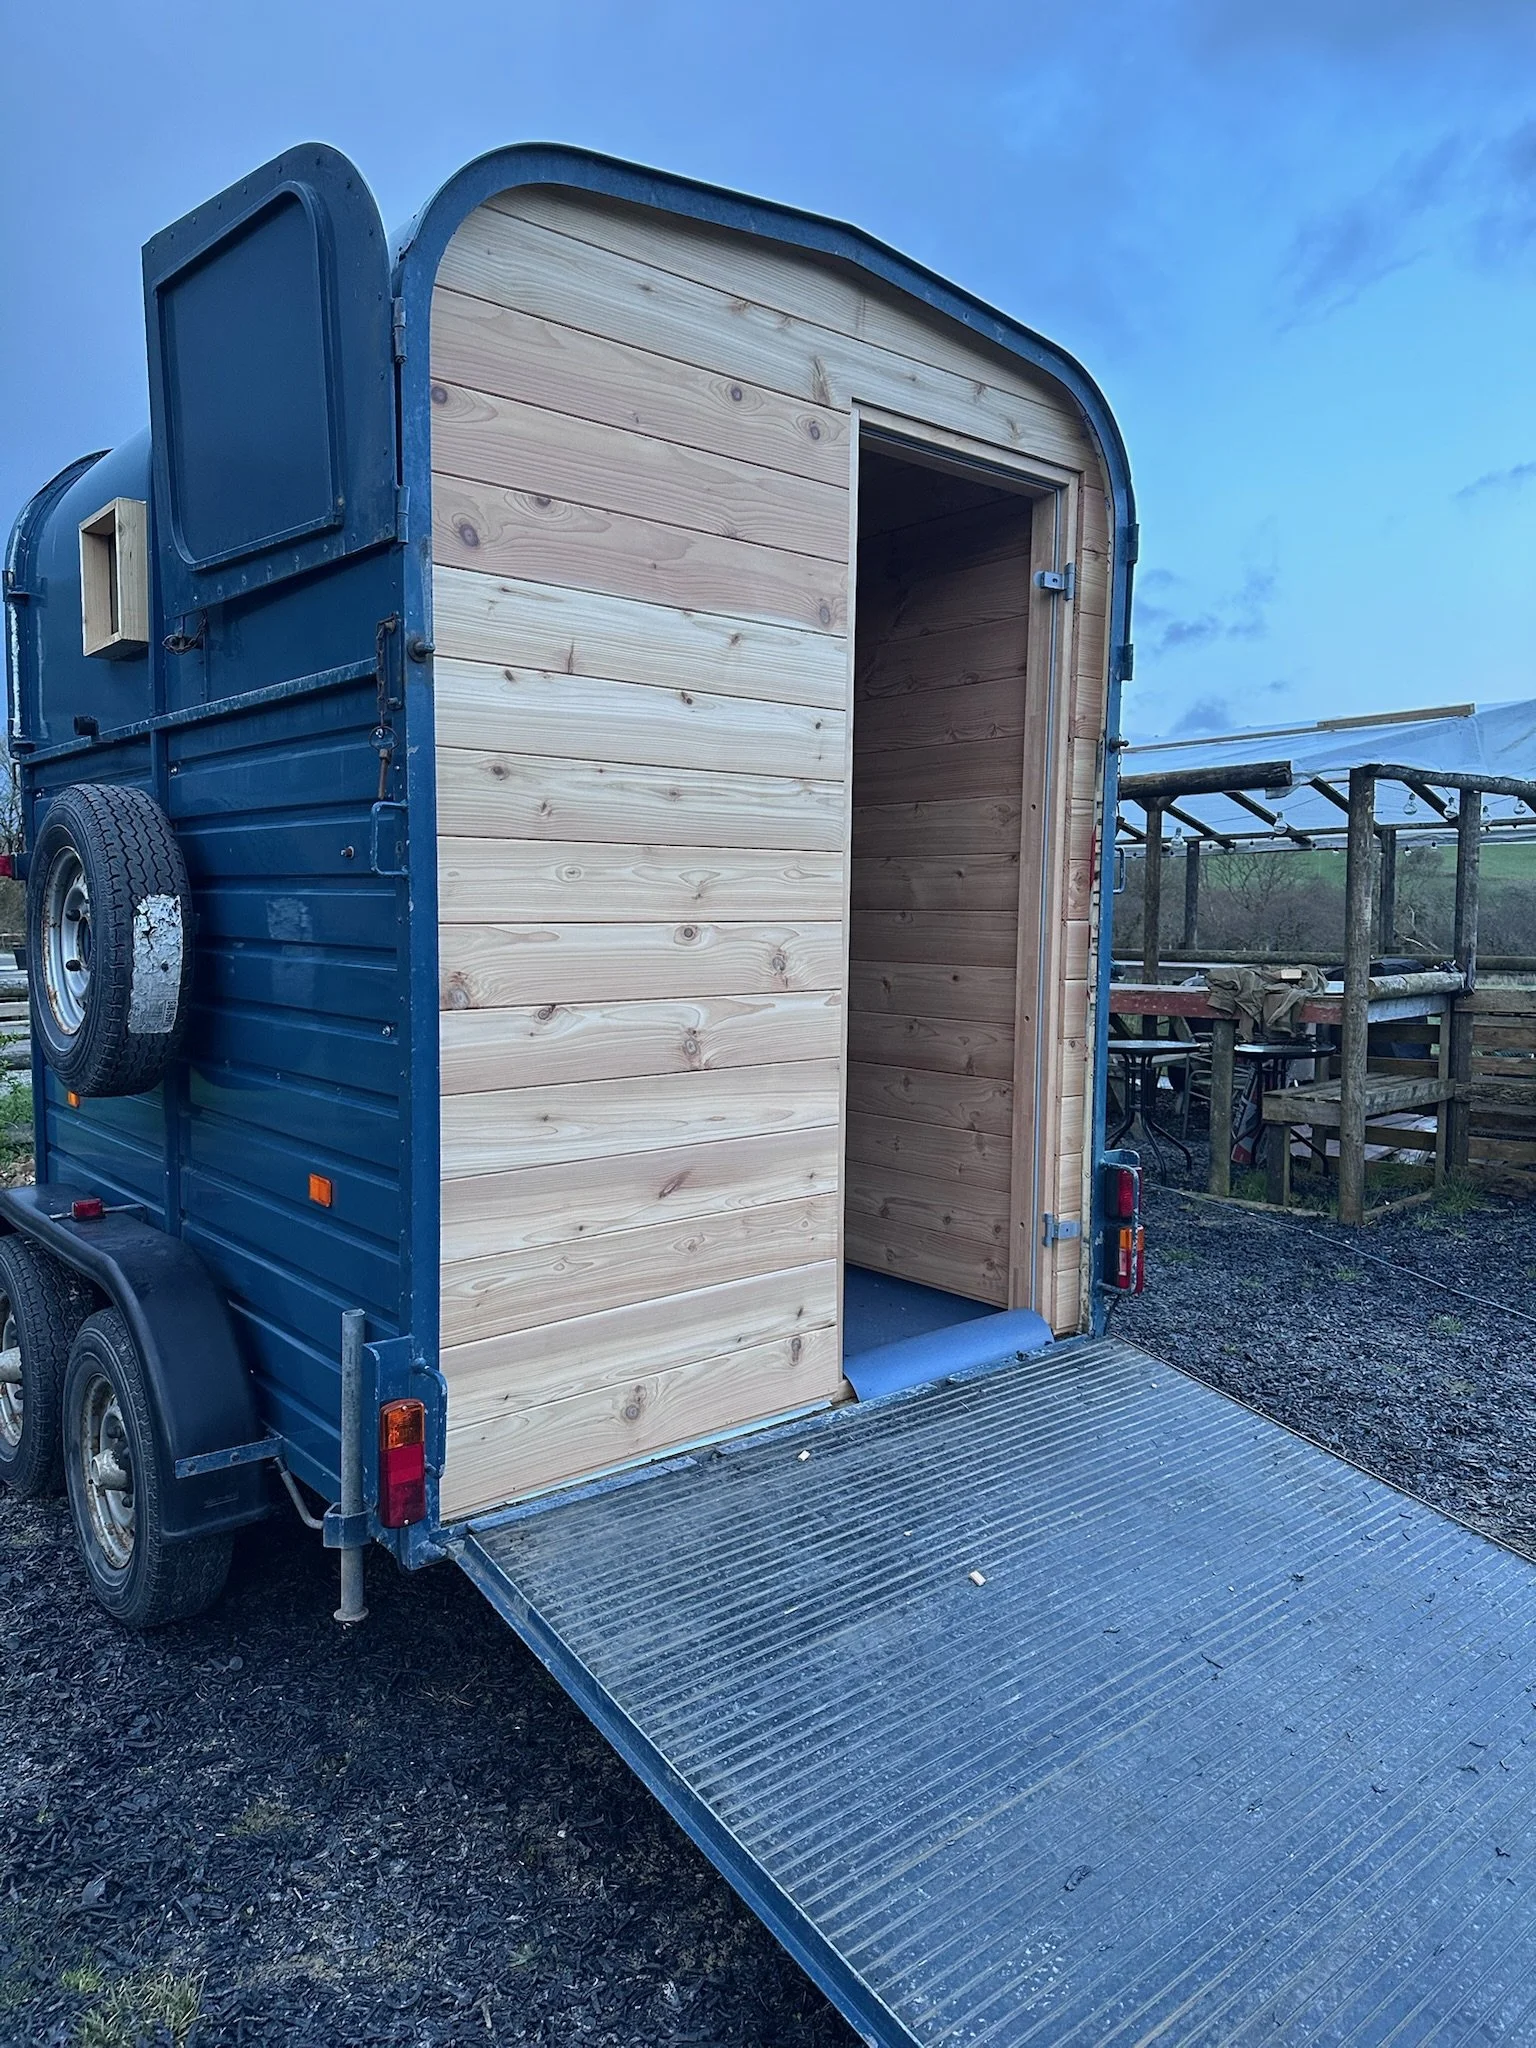
10. Dotting I’s and Crossing T’s
The very last step was finishing the last bits of trim and add-ons including a final sand, coat hooks, paint touch up, oiling windows etc. And the build was done!